
In irrigation systems, we have seen countless ways to make electrical connections for solenoid valves, from terminals to electrical tape, from leaving them free and just wrapped to whatever else you can imagine...
It is important to remember that connecting the wire from the irrigation controller to the solenoid valves is crucial. A poor connection can create short circuits in both the solenoid and the controller, leading to malfunctions that can cause damage, forcing us to call an electrician or even replace the controller or solenoid.
Even though it is a low-voltage system (24 volts) or (9 volts), the problems that can arise are the same as in any electrical system. If not properly insulated, wires can oxidize, reducing signal quality, and if not correctly connected, they can cause the controller to short-circuit during operation.
At this point, the solution should be a IP68 watertight connection system for connecting solenoid valve cables, but if you are unsure which one to buy, it is good to ask yourself some questions.
The first questions we might ask ourselves are:
-
What is your application?
-
Do you need a waterproof connector?
-
What size/type of wire are you using?
There are many ways; we could start with the most common, which are the classic boxes used by electricians with watertight cable glands, in the case of irrigation, but these are not enough on their own because the connection of a solenoid valve is made following a specific diagram.

One wire, the common one (for the 24-volt series it's the same, while for the battery series it's usually black), must be connected to all solenoid valves and then go into the COM (common) terminal of the controller. The other wire, however, will go directly to the signal and therefore must have its own independent box.
At this point, you end up with a bulky connection because, in summary, you will have 1 box for the common and one for each signal.
This is where synthetic resin can come into play, allowing the use of multiple cables in the box; once poured inside, they will be insulated from each other.
The drawback (in our opinion) of resin (if a special gel is not used) is that it solidifies, making the connections insulated but not maintainable. This means that if we had to replace a solenoid or valve, we would have to cut the electrical cable and then redo a watertight connection with another box.
At this point, the resin-filled connectors that we deal with come into play, among which we have selected a series that is easy to use.
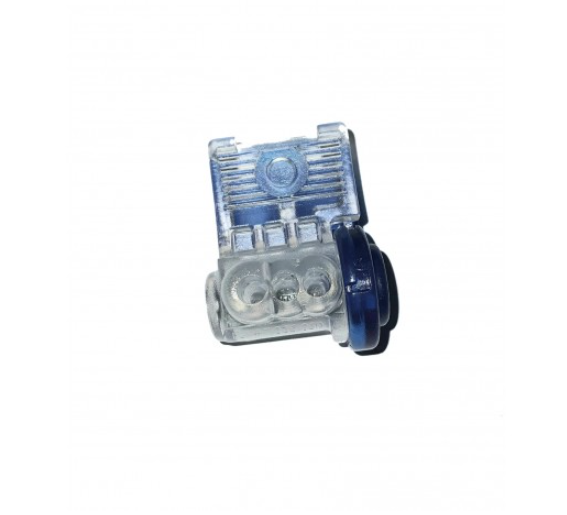
The BSV model, for example, has the characteristic of being able to connect up to 3 cables together, dividing them into 2 x 1.5mm and 1 x 2.5mm, in an IP68 watertight manner thanks to its synthetic resin, and can be disconnected by the simple lip that allows it to be reopened if necessary.
Once the connections are updated, it is always recommended to replace it, although it could actually be reused at least once.
Our BVS product – is right for you, and its features are as follows:
-
IP 68 waterproof
-
Low voltage
-
Silicone-filled connector
-
Safe, fast, and reliable
-
Strong wire clamp
-
BVS1: Max 300V
-
BLS10: 10AMPS
-
Connector dimensions: 3.7 cm x 2.64 cm
-
Max temperature rating: 105 ° C
Assembly Notes
IMPORTANT: Turn off before installing or removing the connector. Product to be used in accordance with local and national codes.
1 ) Open the ends (clear and light blue) by rotating them fully beyond 90 degrees.

2 ) Insert the stripped cables (for a minimum of 0.5cm) into the holes (they are all connected to each other). Push the wires into the connector (the cable ends should be visible through the clear back of the connector)

3 ) Hold the cables in place while closing the ends (the clear and light blue ones) together until the connector snaps shut.

